Remember that annoying tv advertisement for a sound activated light switch? That’s certainly one way to control lights, as is the simple toggle switch. But there are several others help you tailor your luminous environment to your mood and needs at that point in time.
First, if you are remodeling, or building new, consider adding more, rather than fewer lighting options to a space. In important rooms like kitchens, dining rooms, living rooms, and family rooms, I like to suggest at least 4 and up to 6 circuits of lighting to choose from. Make as many of those as you can on DIMMING switches, so you can adjust the level to the scene you are trying to set. Dimmer switches are wonderful, and there are different types you can use, depending on your preference and manual dexterity. Back in the 80’s, mostly what you saw were those clunky round rheostat knobs that you pressed for on and off. Today, I much prefer what I call “fingernail slide dimmers” which are a miniature slide dimmer to the right of the toggle or rocker switch.
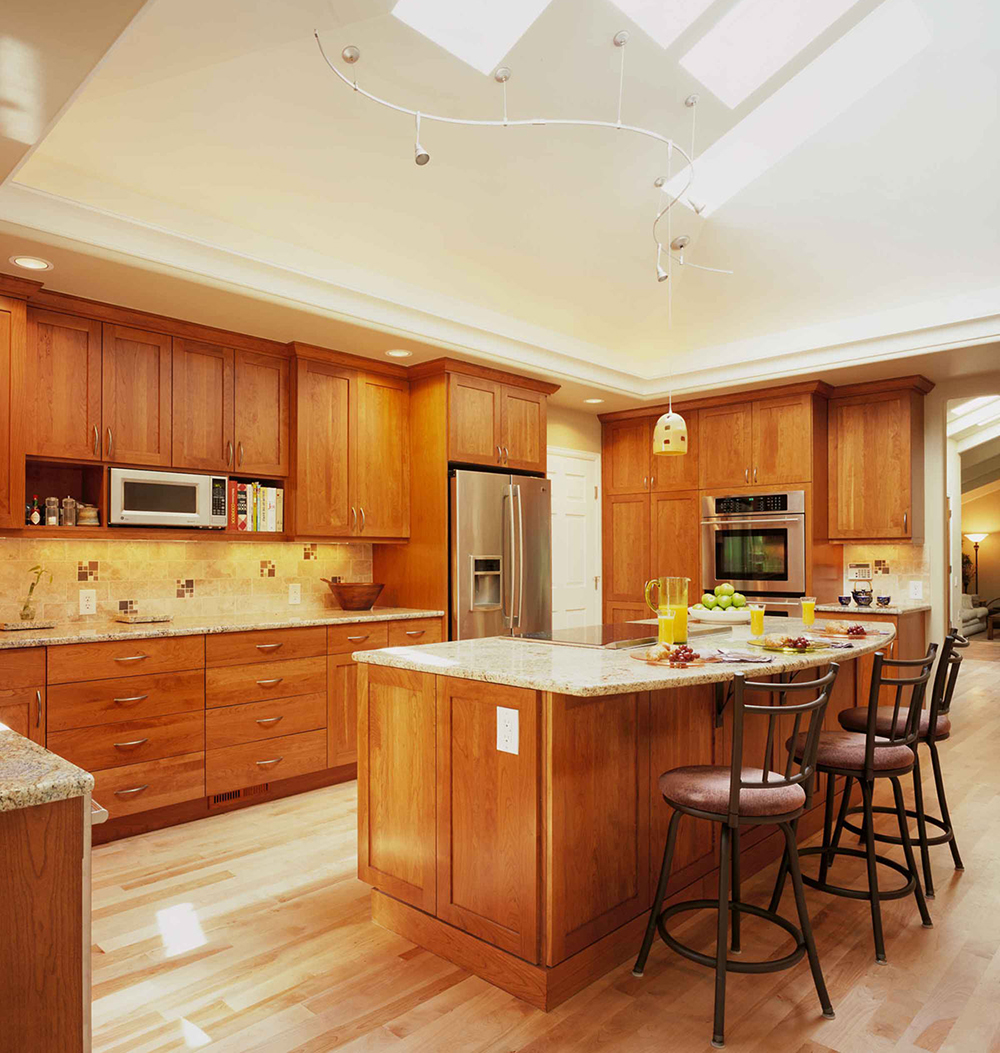
By capturing unused attic space over this 1960's kitchen, we were able to flood the room with daylight. At nights, 5 circuits of lighitng, all on dimmers, provides precise control.
Here’s a kitchen transformation we did recently on a 1960’s trilevel. The first and most significant light(and the least expensive) comes from the four new skylights overhead. The light varies according to the season and the time of day. Next, we added recessed downlights for task lighting at countertops. Then undercabinet lights, on their own dimming circuit. Then we added track lighting, including pendant lights that add a decorative element as well as function. Finally, xenon mini lights behind a cove provide a wash up indirect uplighting. Again, all circuits are dimmable, so you can manipulate the scene in an almost unlimited variety. There are switches at the entry from the garage, the entry from the dining room, and the entry from the backyard so you never have to stumble into the room in the dark.
One useful upgrade to such a system of 4 to 6 circuits is to collect them into a single box, with on at the top, off at the bottom, and 3 or 4 “scenes” in between. The scenes are ones you or your lighting designer program during set up right at the keypad, or sometimes in a nearby closet. Since most people have favorite light levels, the scenes make it easy to get back to those. For example, in my own kitchen, we have 6 circuits, and use one of them alone, the basic task lighting, about 75% of the time. While using those downlights, we seldom ever raise their light output to more than 60% of their maximum. (For incandescent or halogen sources, dimming greatly extends lamp life). But we use ALL 6 circuits at different times for different events, and are glad we have them ready to go!