Concrete Thinking

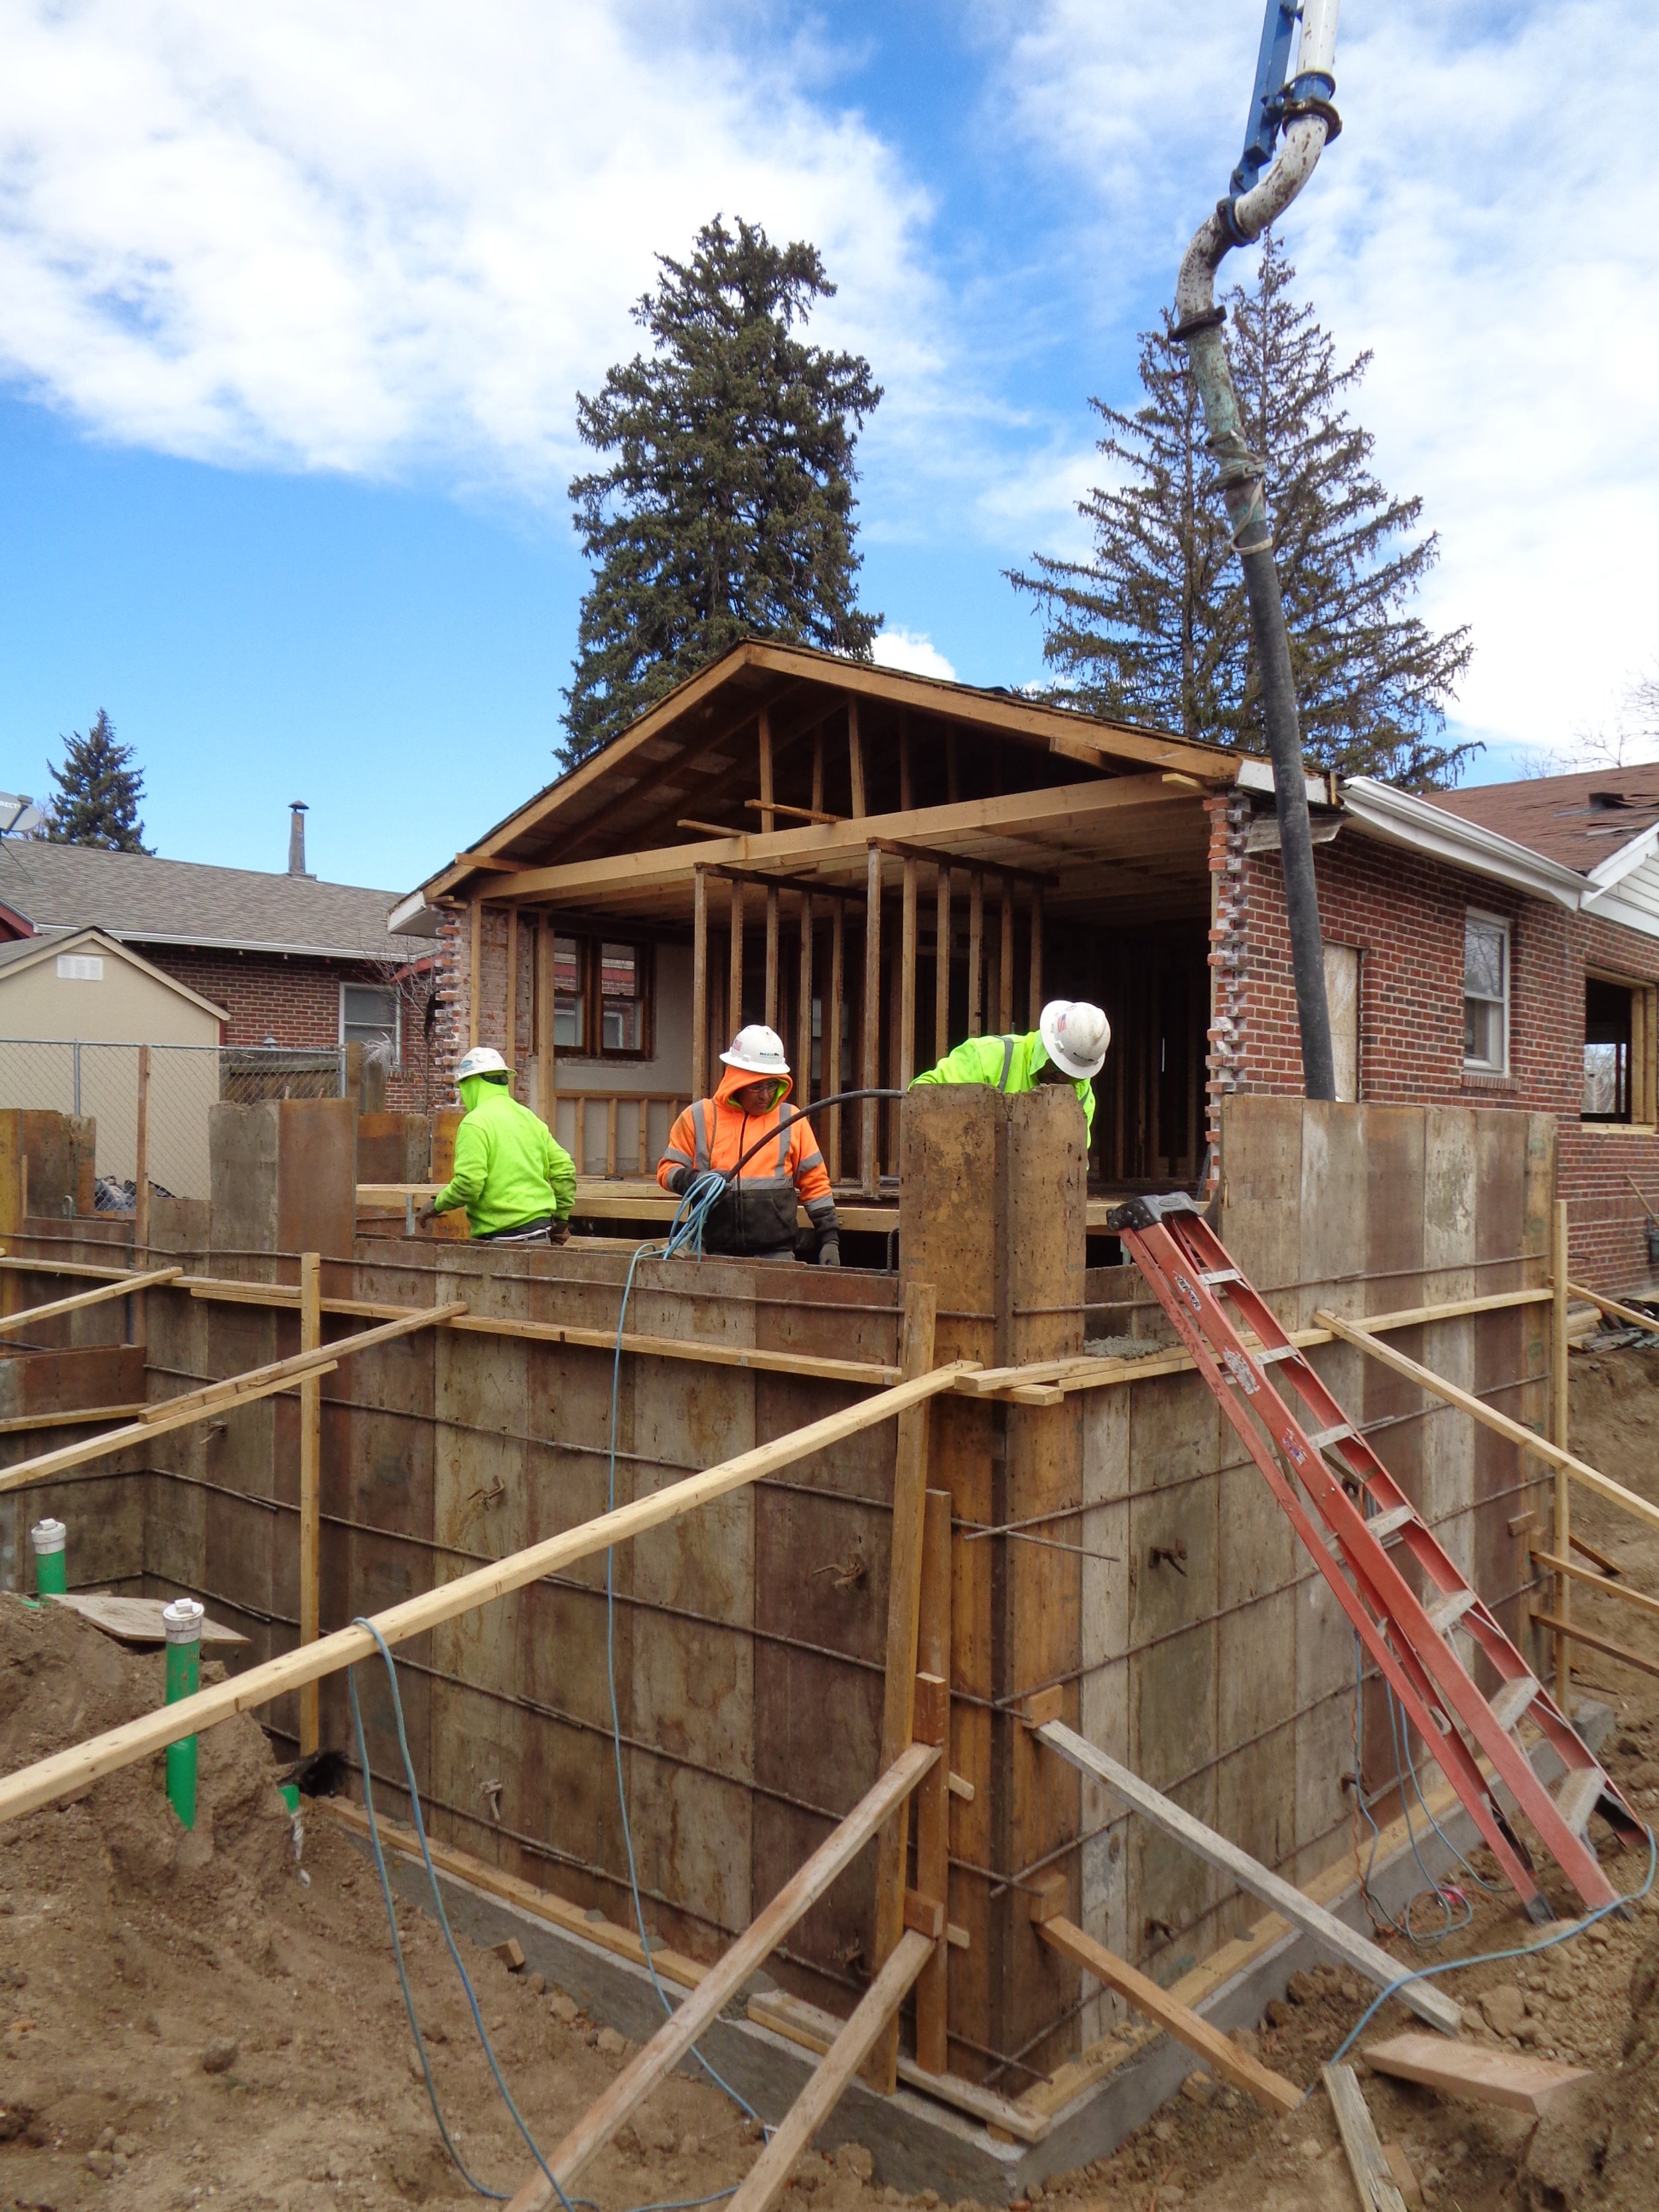
I'm constantly amazed by the process of forming and pouring concrete foundations, like this one being built for an addition to a bungalow in Wheat Ridge, CO.  The forming crew has to build a plywood wall in which the concrete will go, only to tear it down once the concrete has initially set (as little as 24 hours, although it will take a month to reach full strength).  But before they can "button up" the forms, all the reinforcing steel rebar, both horizontally and vertically, has to be carefully placed and inspected.  The old concrete foundations for this 1926 home had no steel rebar at all!

When the area to be poured is behind a home, with no safe alley access, they bring in this amazing concrete pumper truck (on right), with an articulating boom, and the concrete mixing truck dumps the grey goop into the hopper to be pumped 100 feet or more . The boom operator controls this from a portable controller hanging from his neck. The lead worker on the concrete crew guides the long flexible hose to all portions of  the forms, while several assistants follow closely behind with an industrial-strength "spud vibrator" (looks like a potato on a cable) which  is pushed down to vibrate the liquid/cement mix so there are no air pocket voids.

The magical moment is a day or two later when the crew comes back and knocks the plywood forms apart, revealing a solid concrete wall, (shown above).  There is no other material we use that has that phase change property, and it never ceases to amaze me!  I'm glad I work in an area of the country that favors poured concrete foundations, as they are far superior to concrete block foundations that are used elsewhere.

KITCHEN LIGHTING RECONSIDERED

KITCHEN LIGHTING RECONSIDERED

Anyone who thinks about this for a minute knows: if you want maximum light on a countertop , you place the light directly overhead, or 24 inches off the wall.    But that’s not how it’s been taught for the past 3 decades.   Two of the most popular texts for kitchen designers have illustrations showing can lights placed 48 to 56 inches off the wall, usually in the walkway between wall cabinets and the island.

For my current  ProRemodeler article, “Recessed Lighting Reconsidered”  I turned my client’s home into a lighting lab, testing two different size cans, 4 and 5 inches, with 4 types of lamps for each. 

Read More

Gloomy Outlook for Googie Landmark

A sign taped to the window of this quirky dry cleaners in Cherry Creek is the writing on the wall: "Application for Determination of Non Historic Status".  The land under the building is worth far more than the building itself in the developer's mind, and the block will soon have one more of the tower cranes that dot Cherry Creek North in it's race to resemble Manhattan.  And we'll lose another building from our more recent past.

DSC04093.JPG


This round building with the swooping parabolic roof was built in the late 50's or early 60's, and is quite representative of the "Googie" style of modern architecture, a futuristic architecture influenced by the car culture, jet airplanes, and the space age.  It originated in Southern California after WW2, when architects like John Lautner realized that the public was moving past the landscape at a much faster pace due to the automobile, and they needed buildings that could be"read " instantly for what they were.  So Googie style became the rage for car oriented building types like diners, gas stations, and motels.

The original McDonalds, with its giant golden arches, is classic Googie. In Denver,  Bastiens Steakhouse on Colfax, Sam's #3 at 1500 Curtis, and the Sleeper House by Charles Deaton, are all classic Googie, as was the I.M. Pei hyperbolic paraboloid in front of the May D& F, torn down in 1996. Influenced by the Streamline Moderne style of the 1930's, this style exploited upswept roofs, curves, and use of glass walls with aluminum and steel.

I'm just finishing my three year term on the Denver Landmark Preservation Commission, and one thing I've noticed is that we give most of our attention to pre war architecture, with little recognition of distinctive buildings from the 50's forward.  My fear is that until momentum builds towards appreciation of great designs from the 50's, 60's, 70's and newer, we will have lost most of them, like this one.  Is this building unique? No, I can show you a twin on West Jewell in Lakewood, and there are probably others I haven't found, but it was one of a kind where it was, in the upscale Cherry Creek neighborhood, and I'll miss it when it's gone.

CLAP ON! CLAP OFF! Simple Lighting Control

Remember that annoying tv advertisement for a sound activated light switch?  That’s certainly one way to control lights, as is the simple toggle switch.  But there are several others help you tailor your luminous environment to your mood and needs at that point in time.

First, if you are remodeling, or building new, consider adding more, rather than fewer lighting options to a space.  In important rooms like kitchens, dining rooms, living rooms, and family rooms, I like to suggest at least 4 and up to 6 circuits of lighting to choose from.  Make as many of those as you can on DIMMING switches, so you can adjust the level to the scene you are trying to set.  Dimmer switches are wonderful, and there are different types you can use, depending on your preference and manual dexterity.  Back in the 80’s, mostly what you saw were those clunky round rheostat knobs that you pressed for on and off.  Today, I much prefer what I call “fingernail slide dimmers” which are a miniature slide dimmer to the right of the toggle or rocker switch.

By capturing unused attic space over this 1960's kitchen, we were able to flood the room with daylight. At nights, 5 circuits of lighitng, all on dimmers, provides precise control.

By capturing unused attic space over this 1960's kitchen, we were able to flood the room with daylight. At nights, 5 circuits of lighitng, all on dimmers, provides precise control.

Here’s a kitchen transformation we did recently on a 1960’s trilevel.  The first and most significant light(and the least expensive) comes from the four new skylights overhead. The light varies according to the season and the time of day.  Next, we added recessed downlights for task lighting at countertops.  Then undercabinet lights, on their own dimming circuit. Then we added track lighting, including pendant lights that add a decorative element as well as function. Finally, xenon mini lights behind a cove provide a wash up indirect uplighting. Again, all circuits are dimmable, so you can manipulate the scene in an almost unlimited variety.  There are switches at the entry from the garage, the entry from the dining room, and the entry from the backyard so you never have to stumble into the room in the dark.

One useful upgrade to such a system of 4 to 6 circuits is to collect them into a single box, with on at the top, off at the bottom, and 3 or 4 “scenes” in between.  The scenes are ones you or your lighting designer program during set up right at the keypad, or sometimes in a nearby closet.  Since most people have favorite light levels, the scenes make it easy to get back to those.  For example, in my own kitchen, we have 6 circuits, and use one of them alone,  the basic task lighting, about 75% of the time. While using those downlights, we seldom ever raise their light output to more than 60% of their maximum. (For incandescent or halogen sources, dimming greatly extends lamp life).  But we use ALL 6 circuits at different times for different events, and are glad we have them ready to go!

GET A GRIP!

Since hospital-treated injuries related to stairs or steps in 1994 were at 1,030,000, and falls cause 87% of the fractures in the elderly,  we all need to pay better attention to ways to make stairs safer. Not just for seniors, but for all of us at all times; whether tired, under the weather, under the influence, or simply wearing an unfamiliar pair of shoes on a familiar stair.

A 2x8 oak rail from the 80's was brought up to code by adding a floating 1 1/2" round steel pipe rail on top, that is continuous from basement to second floor.

A 2x8 oak rail from the 80's was brought up to code by adding a floating 1 1/2" round steel pipe rail on top, that is continuous from basement to second floor.

Codes today ask for a continuous railing from top to bottom of a stair, at a height ofbetween 34 and 36 inches. Codes were less specific in 1982, when this townhome was designed. Then, the latest fashion was a simplified “handrail” of a 2×6 or 2×8. This one only came up to 31″, and the other problem with it was that it is impossible to really grip such a board. At best, you can pinch it, assuming you have hand strength.  While wanting to preserve the vintage look we wanted to greatly improve safety, so we designed a floating 1.5″ metal pipe rail, continuous from the basement all the way up the second floor, at 35″ above the treads. The owners and guest use the handrail all the time, as it falls naturally to hand when going up or down.

Want to take it a step further?  Do continuous railings on BOTH sides of a stairway, and double the safety.

TOTALLY TUBULAR (SKYLIGHTS)!

Next to the invention of sliced bread, I can think of nothing that has made life easier for the homeowner than the invention of tubular daylighting devices.  The concept is as old as the Egyptians, but it was Solatube International of Australia who patented and first marketed what we know today as TDD’s in 1986. Other manufacturers soon followed, with sizes ranging from 10 to 22 inches in diameter. Many have a mirror on the north side of the plastic bubble on the roof, to reflect maximum south sun down into the pipe, more sophisticated ones actually have tracking sensors that rotate the mirror to follow the sun throughout the day.

Prior to that , the only option for toplighting was a skylight, which by itself wasn’t much money, but add in the framing changes, insulation and drywall, and pretty soon you get up into the thousands, where a TDD can be installed for around $500-$700 in most homes.

Being landlocked in the middle of the floorplan was no hindrance to flooding the space with natural light, using a Velux Sun Tunnel.

Being landlocked in the middle of the floorplan was no hindrance to flooding the space with natural light, using a Velux Sun Tunnel.

They are perfect for stairways, hallways, laundry rooms, and bathrooms, like this inside bath in a remodel in a northern suburb of Denver by our firm with Reconstruction Experts, contractor, and Andrea Lawrence Wood, interior designer.  Here , one strategically placed 10” Sun Tunnel (by Velux) fills the bath with daylight, and lessens the need to turn on a light during the day. It threads its way down through rooftrusses to deliver it’s light at the ceiling.  One upgrade we insist on is insulation wrapping the tube, to avoid heat loss to the attic, or heat gain in the summer.

Tubular daylighting devices are easy to install and flash, small enough to work their way down through complicated roof framing, as they can be bent and run as much as 50 feet without losing effectiveness. Luckily, most attics are only going to require about 6 to 10 feet of run.  The most common reaction of homeowners is “Wow!” The most common reaction of guests is “How do I turn that light off in the bathroom?”  I consider TDD’s one of the most useful tools in my daylighting toolbox for any project.